by
by Replacing an electric dryer cord is an essential skill for homeowners upgrading or repairing their appliances. A faulty or outdated cord can pose significant safety risks, including electrical shocks and fire hazards. By learning how to replace a dryer cord, you can save on repair costs, ensure compliance with modern electrical codes, and enhance your home’s safety. This detailed guide ensures you complete the process confidently, even if you’re new to appliance repairs.
Tools and Materials
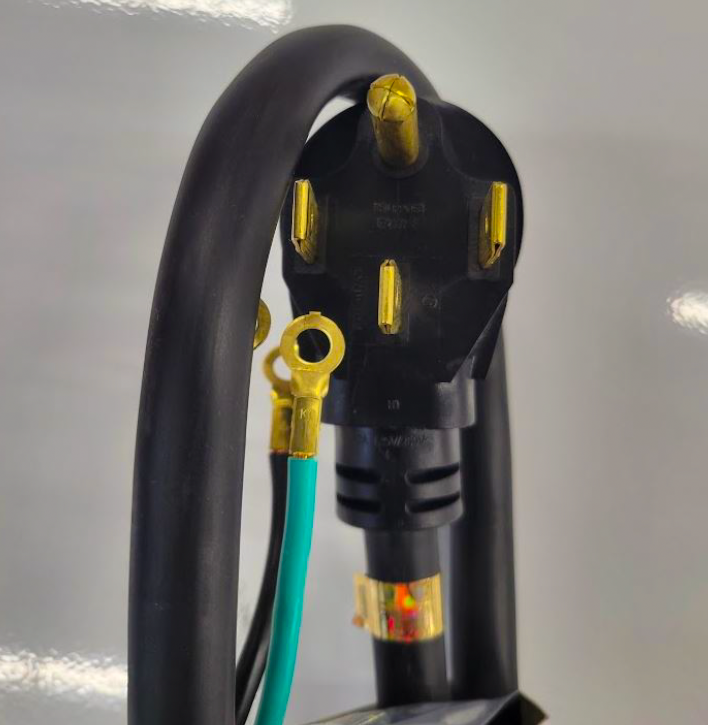
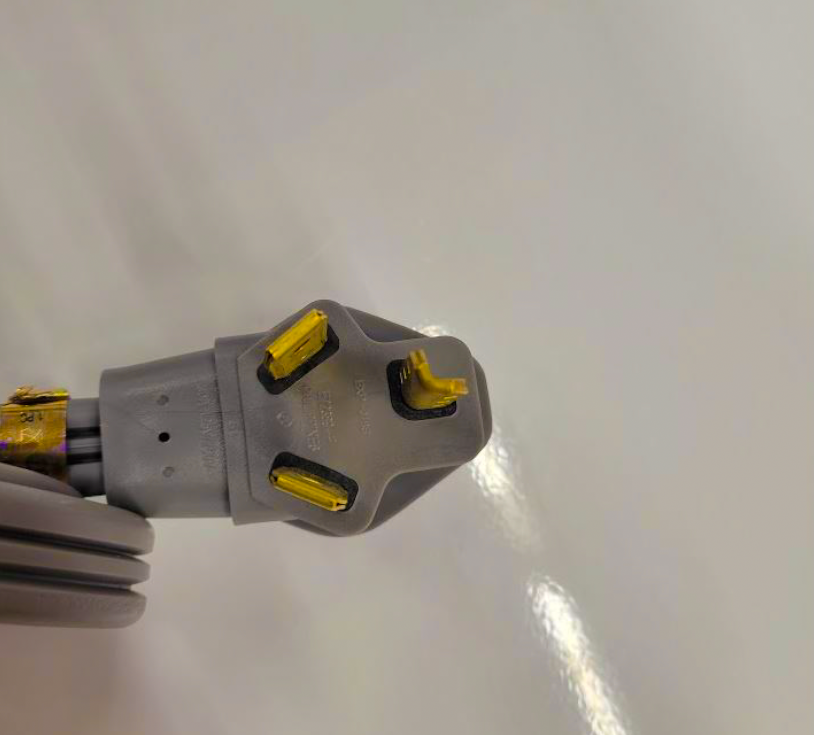
- New dryer power cord (3-prong or 4-prong to match your outlet)
- UL-listed strain relief clamp
- Screwdrivers (Phillips and flathead)
- Adjustable wrench
- Work gloves
Step 1: Ensure Safety
Unplug the dryer from the electrical outlet. Confirm whether your outlet is 3-prong or 4-prong, as the wiring differs. Work in a well-lit, ventilated area, and wear gloves to protect your hands.
Step 2: Access the Terminal Block
- Locate the terminal block cover at the back of the dryer.
- Remove the screws holding the cover and set them aside for later use.
- Observe the wiring layout carefully. Take a picture if necessary.
Step 3: Remove the Existing Power Cord
- Loosen the screws holding the cord wires to the terminal block.
- Detach the wires in this order: neutral, hot wires, and ground (if present).
- Remove the strain relief clamp, if installed, and pull the cord free.
Step 4: Install a New Strain Relief Clamp
- Insert the strain relief into the cord entry hole.
- Thread the new power cord through the clamp, leaving 6 inches of cord inside the dryer.
- Secure the clamp snugly to prevent cord movement.
Step 5: Connect the New Cord
For a 3-Prong Cord:
- Attach the center wire (neutral) to the center terminal.
- Connect the two outer wires (hot) to the left and right terminals.
- Ensure the metal ground strap links the center terminal to the dryer frame.
For a 4-Prong Cord:
- Disconnect the ground strap from the center terminal.
- Connect the white wire (neutral) to the center terminal.
- Attach the red and black wires (hot) to the left and right terminals.
- Secure the green wire (ground) to the dryer frame’s designated ground screw.
Step 6: Reassemble and Test
- Replace the terminal block cover and tighten the screws.
- Plug the dryer into the 240-volt outlet.
- Test the dryer by running a simple cycle to check functionality.
Key Tips for Success
- Always refer to your dryer’s user manual for wiring diagrams.
- Double-check that connections are secure and wires are properly aligned.
- If unsure, consult a licensed electrician.
Replacing a 240-volt electric dryer cord is straightforward with proper precautions. Following these steps ensures a safe and functional installation, keeping your appliance ready for reliable service.or reliable service.